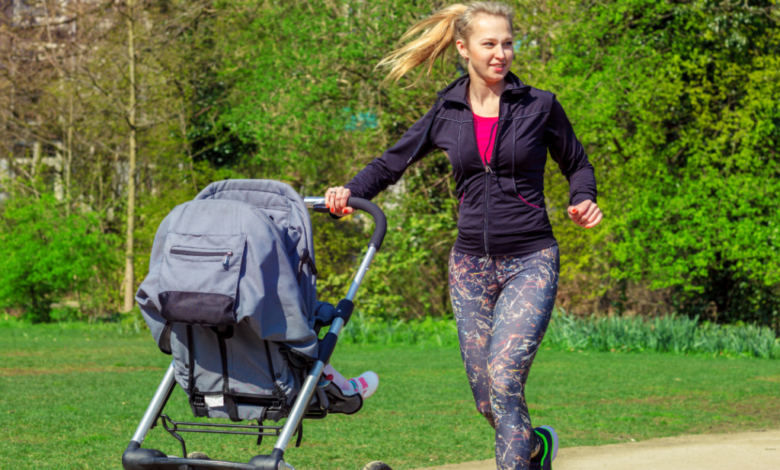
Postpartum Return to Running and High-Impact

If you were a runner, or avid exerciser, before pregnancy, it can be tempting to quickly return to this type of activity in the postpartum period. While it’s certainly beneficial to incorporate a variety of movements into your workouts, rushing into high-impact activities — like running and jumping — before your body is ready to handle the stress of impact, can set you up for a potential injury and pelvic floor issues.
In this post, we’ll give you a step-by-step plan to gradually prepare your body to safely manage impact stress. Please note that this process takes some time, but it is the safest and most effective way to get back to running pain-free and leak-free.
Step 1: Do the Core Recovery Work
Before continuing the impact, it is important to go through basic recovery work to restore strength to the traumatized tissues of your deep core, especially your pelvic floor muscles, which must be able to withstand the added stress of the impact. To get started, check out these very useful ones postpartum core recovery exercises. You can also go through our whole 8-week basic recovery program, which helps you rebuild your core from the inside out in just 5 – 8 minutes per day. Finally, working with a physical therapist who specializes in women’s health can be a good option. You can use it PT Locator provided by APTA (American Physical Therapy Association) Pelvic Health to find a qualified women’s health physical therapist near you.
Step 2: Build Lower Body Strength
After completing your core recovery work, the next step is to build strength so that your soft tissues – muscles, fascia, tendons, etc. – can act as effective “shock absorbers” during impact. Just as a car has shock absorbers to soften the effects of bumps in the road to protect the car and offer a smooth ride to the passengers, you must build your body. suspension system to break down impact forces so your joints don’t break down and cause damage over time.
The first step in building your body’s suspension system is building lower body strength. It is advisable to start with two feet moving like squats, ground pickups (deadlifts), and bridges. Then, integrate single-leg moving, because it requires more strength, control, and balance. For some great single-leg strength exercises, check these out 5 moves to build lower body stability.
Finally, for a complete (total body) strength training program, explore our 16-Week Postpartum Training Program. This program takes you through our complete core recovery program mentioned above, then helps you safely and effectively build strength (including the lower body strength required for impact).
Step 3: Introduce Speed
Once you’ve developed your repertoire of basic lower body movements, you need to speed them up because jumps, hops, skips, jump ropes, and runs are all. higher speed activities. This is often the step most people overlook, but it is most critical step for preparing the tissues to handle the impact and protect your pelvic floor.
Here’s a 3-part progression to introduce speed with a basic squat down that you mastered in step 2. Click on the links to watch a video demo of each.
- Slow, Fast: Slowly lower into your squat, then exercise shooting up to speed up the ascent.
- Fast Down, Slow Down: This time, you descend quickly (harder on the suspension system), and stand up slowly.
- Fast Down, Fast Up: Now, put them together for quick entry both directions.
Be sure to master each move in numerical order — without pain or leakage (urinary or fecal) — before moving on to the next move.
Step 4: Introduce the Effect
Now that your “suspension system” is in place from doing recovery work, strengthening, and adding speed – you can start to show results. To do this in a safe and effective way, start slowly with only single jumps, then work towards consecutive jumps. Watch the 2-part development below
- Squat Jumps-Single: Start with single jumps only and focus on landing quiet.
- Squat Jumps-Sequential: Once you feel in control of single jumps, then work towards multiple jumps in a row (landing quietly). If you have any joint pain or stiffness, reduce the height of the jump or the amount of reps.
Stop Signals
If, at any part of this process, you feel pain o dripping (urinary or fecal), this is a sign that your body is not ready for the movement you are doing. Therefore, you may need more time in the previous step.
Additional Resources
Explore our Postpartum Training Programs to help you progress through steps 1 and 2 above so you’re fully prepared to move on to steps 3 and 4. Or, consider working with one of our experts PROnatal Personal Trainer who can develop a customized program to take you through the entire process in a way that is right for your body and your goals.
Finally, if you’re interested in learning more details about postpartum training — including more exercises to promote impact at work — explore our education to become a Pre/Postnatal Performance Training Specialist.


